Toys
Aria is easy, Tama is hard
(the title can be interpreted multiple ways…)
Isekai Prime, episode 5
Just in case there was any ambiguity about the details of Our Shopping Hero’s dalliance with Our Easy Landlady, having her wriggle under the covers, strip, and jump him when he happens to spend a night in her inn again clears it up. Pity she got cockblocked by the loli before we got a buy-the-bluray scene.
As for Our Bouncing Bounty Blonde Waifu, does she realize that she’s just named herself The Town Bike? Or is she a tad distracted by what she finds when she goes to Claim Her Man?
Verdict: I figure the change of scenery will last about two weeks before we get another Blonde-service moment.
($10 says Our Blue Furry-Boobed Cuddly Catgirl tracks him down first)
Unrelated…
It’s a sad commentary on Our Post-COVID World that the grocery near me that was open 24/7 for over forty years now closes earlier than the local Hustler store. Before I left for Silicon Valley in 1993, I could buy anything from steak to vacuum cleaners to ammo at 3 in the morning. Now it’s just convenience-store snacks, or cock rings and lube.
(six months from now, there will be a Sheetz half a mile from my house, but that just adds freshly-prepared sandwiches/snacks to the midnight convenience-store experience)
WSL2 FYI
If you have a directory containing a bunch of files on your Windows
drive that have long names full of embedded Unicode characters,
attempting to access that directory from WSL as /mnt/c/folder will
blow chunks. It stops reading the directory listing as soon as it hits
the first long filename, and ignores anything after that point (which
makes for a really poor rsync experience).
(sadly, SwarmUI’s downloader turned out to be the culprit, since it saves downloaded models and LoRAs by their insanely long descriptive titles, which make Isekai novels look concise, because they contain isekai titles and their translations)
Aria is easy, Tama is hard
My Volleyblonde Elf Gal was giving off Three Behemoths vibes, except for the thicc-ness, so I tinkered with the physical description, moved her to the streets of a medieval town, put her in kinda-SFW bikini armor, removed the emphasis on the naughty bits, and gave her a cat riding on her shoulder or breasts.
Creating a pseudo-Aria was straightforward, even without a LoRA of the character: platinum-blonde busty elf gals are well-represented in the training data.
Random randoms of randomness
SwarmUI has a fairly robust wildcard system with some interesting features, but it doesn’t come close to what’s possible with A1111’s Dynamic Prompts extension.
DP advantages:
- non-repeating random selection (“draw five cards from a deck”, “select 1-3 distinct items of lingerie”)
- exhaustive combinatorial selection (“generate girls with every possible hair color and breast size”)
- weighted random (“normal hair colors are 5x more likely than goofy dyejobs”)
- recursive parsing (wildcards of wildcards of alternatives…)
- simple globbing to select from multiple lists (“hairstyle from the 19xx era”)
- variables that can be evaluated at either compile-time or runtime (“$color $random_dress, $color $random_stockings”)
- variables as arguments (“lingerie-set($color)”)
- insert into middle of phrase (“my waifu $sexytimes me every night”)
- YAML-format files transparently containing a full tree of wildcards with all of the above features available.
This all depends on a Python library called, appropriately enough,
dynamicprompts by the
same person, available through a pip install near you. It does not
come with a simple CLI interface allowing me to just paste processed
prompts into SwarmUI, so I wrote one:
Time, Temperature, Foaminess
Okay, even though I bought the foam-as-a-service frother, I decided to go under the hood and record the precise behaviors and results of the various settings included with the Nespresso Barista Recipe Maker. In a spreadsheet, because that’s one thing they’re useful for.
Given the caloric potential, I’m only doing one or two recipes a day. The nominal capacity of the device is 100-250 ml of liquid, 30-90 grams of ice, and 15-40 grams of solids (chocolate squares, in the supplied recipes), which will be optionally heated and whipped into some mix of liquid and foam.
On some settings, it will detect a lack of sufficient liquid, and demand more before continuing. For instance, 60ml of milk wasn’t good enough for the Cappuccino setting, but 70ml was. But the Affogato setting calls for only 40ml of coffee and nothing else, and works fine. Clearly my spreadsheet is going to need a few more columns.
Since it uses a magnetic stirrer, I’m guessing the “add more liquid” warning is triggering on excessive vibration, which offers another testing possibility, and another column.
Foaming Isolation
Living in Occupied Corona-fornia, I’m still stuck at home with limited visibility outside the bars. The same bureaucrats who’ve spent the past year failing to find their asses with both hands and a cattle prod are telling us the future’s so bright we have to wear shackles. But the check is in the mail, they’ll call us, and they promise not to cough in our masks.
Meanwhile, on the border…

Anyway, I bought another toy
I’ve mentioned that I’m not a milk drinker, keeping the stuff around mostly for cooking, and switching to UHT-preserved single servings over the past year to keep it from going bad on me.
But home-brewed coffee-based beverages don’t have a fraction of the calories and sugar that the street-corner pushers at Starbucks deliver, so, staring at a half-dozen best-before-really-soon UHT milk packs, I decided to give it a whirl.
The good news: the industry-standard allotment for cappuccino and macchiato-ish drinks is 100ml of milk (lattés at ~150ml), and that amount of whole milk only has about 60 k-cals, putting it in the range of my daily dose of liquid pie. Still something to keep a lid on, for the sake of my girlish figure, but not outrageous.
Nespresso has a new-customer offer with a 40% discount on their 4th-generation Aeroccino frother (the aptly-named code “NEW”, requiring a purchase of only 5 sleeves of coffee to go with), but they’re still selling the 3rd generation, and a lot of folks recommend much cheaper options from Miroco, Secura, or Bodum, or even the little stick frothers. But there’s also the pricy-but-excellent Breville Milk Cafe Frother, with induction heating and a full range of manual controls.
And then there’s the toy, Nespresso’s top-of-the-line Bluetooth-connected Barista Recipe Maker, which is of course what I bought. Induction heating, yes, and magnetic stirring for easy cleanup, but designed to be programmed from a smartphone, with coffee-as-a-service named settings rather than manual controls.
You will search in vain to find out exactly which settings do what to the liquids poured inside, at what temperature, and for how long. You manage a local cache of 13 recipes that can be selected from the front panel, which consist of a few numbered steps and some flavor text (literally). Planned future versions of the app will supposedly allow you to create your own recipe programs, but for now you’re limited to their overlapping set of 25, plus the also-overlapping set of 45 online, which usually reference one of the 13 default recipes to choose a setting.
The Original 13 also have glossy printed instructions in the accompanying manual, for non-app use. In eight languages, so now I know what a horká čokoláda is.
The app is a bit stale (full of references to coffees they don’t sell any more, and missing a lot that they do), and the instructions for some of the recipes are simply wrong. For instance, the app version of a Cortado has you pouring 100ml of foamed milk on top of a shot in an espresso cup (more than twice as much as will fit even before it’s foamed). The online version has you prepare the same amount of milk, but only use 20ml of the hot milk and two scoops of the foam, failing to mention that you’re making enough milk for two.
Some online recipes have you firing it up with as little as 60ml of milk, which is borderline; it won’t produce the same results with that little, and it may simply stop and insist you add more before it will continue.
It is widely reported to handle matcha well, and I happen to have a nice bag of not-Japanese-in-the-slightest matcha that I picked up at Costco recently, so I’ll give it a shot. So to speak.
So far, I like it. This morning’s 16 ounces of liquid pie gained a 100ml cap of capp foam, making my daily indulgence significantly more indulgent.
Clone Decapitation, Continued
I cracked four of the Gevalia incompostable pods into my Aeropress to see if the coffee was decent when it all actually went into the cup. Yeah, not so much. It took some work to pop the caps with a paring knife and extract the contents, and the lack of resistance when I pressed the coffee through a single filter told me it wasn’t an espresso grind, which explains why it’s pretty weak sauce. Verdict: they should have shipped their coffee to the same folks who pack Peet’s and Illy into compatible aluminum pods, rather than focusing on feel-good marketing compost.
In other news,
The Harris/Biden administration has turned Banned Books Week into a yearlong celebration. How long before people start digging up their guns to make room to hide their children’s books?

What's holding back the 3D-printing revolution?
Problem #1: search engines.
I searched Thingiverse for “coat hanger”. The first page of results included a hydroponics planter, a broom holder, custom-word pens, filament holders, a geared card shuffler, a toolbox, a chicken water dispenser, and a trebuchet. 8 of the 20 items did indeed have the words “coat hanger” in their description, but 5 of them were really coat hooks, and one of the hangers was for doll clothing. One of the remaining two was a copy of a commercial folding design not optimized for 3D printing: when you need both rafts and internal supports, and it’s still a “work in progress” after three years, and it takes half a day to print…
I didn’t actually need a coat hanger, even the fancy folding travel kind, but a lot of the hype around 3D printing was based on the idea that instead of shipping things to our homes, we’d download plans for things and print them ourselves. Which leads to…
Problem #2: too much fiddling around
Turns out that future is gated by someone managing to build affordable foolproof turnkey climate-controlled dual-extruder 3D printers with precise tolerances and automated (non-toxic!) part-cleaning and ejection, that accept data in a vendor-independent format that clearly describes the parameters needed to print successfully.
Also, the commercial travel hanger linked above is 10 for $10 on Amazon, so that imaginary practical printer also has to be really cheap and really fast.
I expect we’ll see 3d-on-demand shipped overnight from Amazon long before we’ll see it in non-hobbyist homes or even neighborhood print services. Speaking of which, I’d like to see some numbers on just how effectively all the hyped “distributed pandemic ppe printing” efforts actually delivered usable products to people who needed them.

Finally, something practical to print!
Not gonna lie, it won’t be easy…
Unrelated,
The first book of the Solo Leveling light novel is now coming out February 16th. Dead-tree-only, at the moment, without a Kindle version listed.
Plastic flowers not included
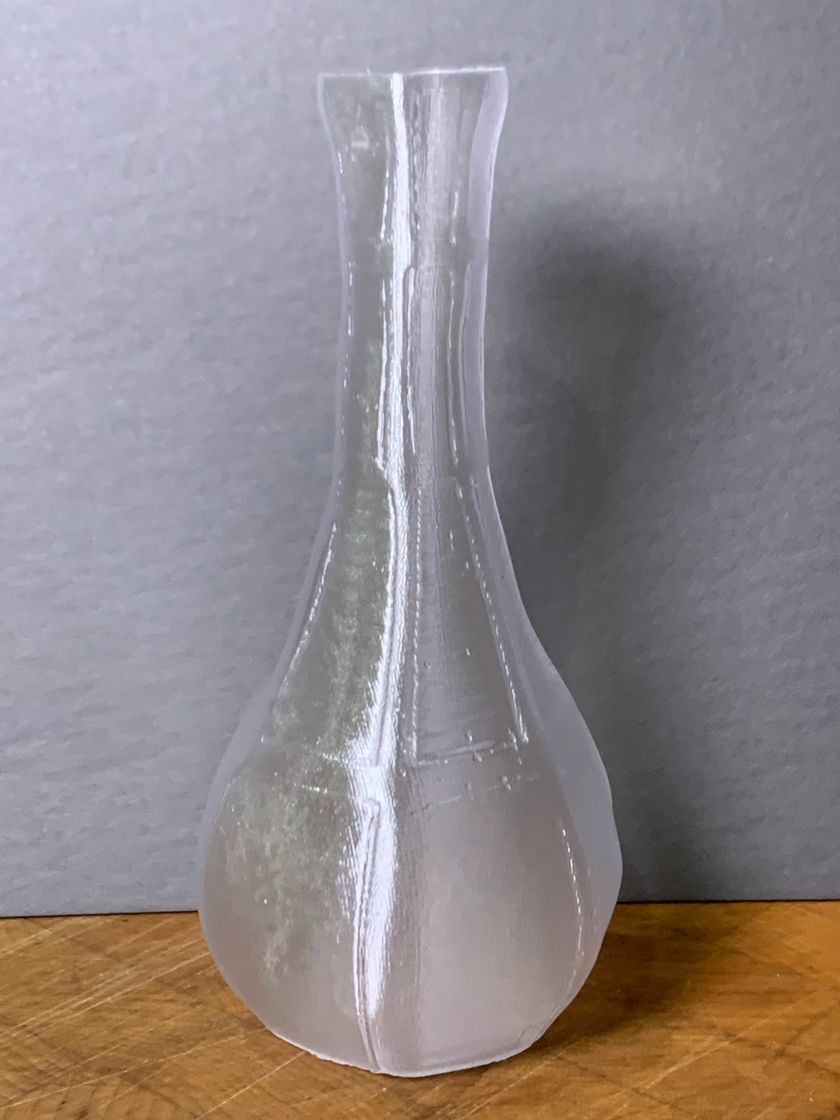
Okay, I made one more print with the translucent PETG before switching back to PLA:
Despite its size, this only used up 10 grams of filament, because it was done in vase mode, something I hadn’t tried before. It’s not quite water-tight, with one very slow leak at the base. This looks like a good way to use up the tail end of a filament spool when you don’t need any more bag clips. 😁
Note: I did not print (literal) plastic titties.
Update: PETG Delivery…
The new filament arrived, and now I have to print another spindle adapter for the external spool holder. If you go to Sunlu’s web site, their product photos insist that their spools have a 56mm spindle size. If you order the stuff on Amazon ($18/spool), however, what you get is a spool with a 73mm hole.
There are a variety of Sunlu-to-something adapters on Thingy, which either have the wrong internal diameter or use ridiculous amounts of filament and take hours to print. I tried a clever low-profile one done in OpenSCAD, only to discover that its creator hasn’t grasped the concept of constructive solid geometry and instead used a great deal of painful calculation that only rendered correctly in the specific version of OpenSCAD he was running. Belatedly, I remembered that I had a perfectly-good spoked wheel design that I used for the baby takadai take-up reel, and it prints quite quickly with minimal filament use.
3D Kleenex
Disease with no Cura
I experimented a bit with Meshmixer to optimize the orientation and supports for a model before slicing and printing with Dremel’s software. Pro: it was easy to remove the tree-style supports it generated. Con: the surface quality was no better for all the extra work involved, and actually required a bit more sanding to be usable.
So I tried the current version of Cura (which has a bewildering array of tree-support options) with the machine definition copied from Dremel’s older version and the built-in generic filament and quality definitions. The print took just as long as with the Dremel software, but practically crumbled in my hand. All the small parts could be snapped off with very light pressure, and the main body’s 20% infill wasn’t enough to survive squeezing between thumb and forefinger. Definitely need to import the Dremel-specific filament and quality settings before I try that again.
Then I tried to decipher the UI for Autodesk Fusion 360, which honestly looks like it was designed to sell training classes. Also, it has a fairly short list of available machine, material, and quality profiles, so I’d have to enter everything by hand for my printer. Yeah, no. If I can manage to figure out how to use it before the mouse bindings drive me to throw a laptop out a window, I’ll try designing a part and exporting to Dremel’s software. It also really, really wants to keep everything in their cloud, which you have to manage from a real browser; it took me a good five minutes to figure out how to completely delete one accidental upload.
Then I took a brief look at FreeCAD, where instead of having their own UI paradigm, they simply emulate everyone else’s and allow you to pick one. Or more. Initial impression: the 2D tools make Illustrator look like the easiest-to-learn drawing software in the world; I didn’t get to the 3D tools. I did like the Bézier curve visualization, though.
CorelCAD is a full-featured 2D/3D package, and for $700 it ought to be. In prehistoric times I found CorelDRAW a lot easier to learn than Illustrator and used it a lot, but then they had a very, very buggy major release that drove me away, and I never looked back. They have free trials of all their software, and a subscription model for some of them, but the very first question on their FAQ page is:
’nuf said.
Video killed by radio star
The Dremel’s camera went offline during one of my prints, and since nothing was listening on the port, obviously the software had crashed on the printer. There’s nothing checking for this and restarting it, so the only way to get the feed back is to power-cycle, which had to wait until I was done sending test prints for the day. The printer still printed, and the status API kept reporting correctly, so it was no big deal. Their app doesn’t really know what to do when there’s no video feed, but it still functions.
By the way, extracting the Busybox image from the latest firmware
update and running strings on the binaries revealed a few additional
commands in the API: GETJOBSTATUS, CANCEL, PAUSE, RESUME, NOZZLEHEAT,
PLATEHEAT, STOPNOZZLEHEAT, STOPPLATEHEAT; I have no need to try most
of those out. A quick tcpdump while I was driving it from the GUI
showed the two-part command to print across the network: you upload
the file by POSTing to /print_file_uploads with name, filename, and
data fields, then POST PRINT=filename to /command (and then spam
it with GETPRINTERSTATUS every few seconds, at least if you’re
Dremel’s software).
Update: unofficial official GCODE/API manual
So, if I ever get another slicer that generates good code for this device, I won’t have to walk the gcode over to the printer on a thumb drive, through the snow, uphill both ways. That will matter more once I move it upstairs into my office, because while it’s not loud, it is audible, and there doesn’t seem to be a way to turn off the built-in lighting. Closing the office door will make lengthy overnight prints less intrusive.
…unless I ever have a houseguest again, because the guest bedroom is right next to the office.
…unless the guest is my sister, who stubbornly insists that my couch provides a much better sleeping experience. Honestly, if I ever win the lottery and build my dream house, her room will just have a sectional sofa, large-screen TV, and a bookshelf. And excellent wifi coverage. Maybe its own kitchen. Oh, what the hell, just make it a studio apartment without a bed.
Little Monsters
If it ever becomes possible to play tabletop games in person again, mz4250’s extremely large set of free miniatures will be useful. The detailing on some of them is nice enough to scale up for decoration, and it’s not just the complete set of D&D monsters and an ever-increasing set of module-specific characters. There are other genres, as well as disturbing nightmare creations.
No Magic Bullet
I think I’ve gone down enough software rat-holes for now. Back to just coding up shapes in OpenSCAD and printing them with the supplied software and its “old-fashioned” support structures.
Additivity: Dremel 3D45 preliminary review
A few quick comments on my new Dremel 3D45:
-
The documentation is laughably terrible, even supplemented by the online support pages and videos. Between the two, you can manage to get it up and running correctly, but everything was very clearly done by tech writers for a power-tool manufacturer, not by a consumer-electronics company.
-
Why, yes, I did manage to misfeed my filament the first time, resulting in a small test print that looked like it came out of one of the first low-budget 3d-printer kits on the market. Fortunately I knew what a skipping stepper motor sounded like, and was able to quickly abort the print and start over.
-
The touchscreen is kinda cheap for a $2,000 printer. Clear and bright, but only responsive to slow, firm touches. Entering my 52-character wifi password (three times) was quite painful.
-
And, yes, I had to set up wifi even though I had an ethernet cable plugged in when it booted the first time.
-
By the way, all the documentation insists that there is no LAN printing support, and that if you want to print without a USB cable or thumb-drive and watch your job through the built-in camera, you must connect to their cloud. Neither of these statements is true. Works great, auto-detects printers on the local LAN (wired or wireless), shows the progress and remaining time, and the camera even includes the filament spool in the frame so you can visually confirm that you’re not running low.
-
Also, their cloud setup got stuck in an endless SSO-auth loop. Yeah, fuck the cloud.
-
The bundled software, which initially seems a bit limited, is in fact quite competitive, being built around the open-source Cura package, which means that it includes the ability to read
.fdm_materialfiles for a wide variety of third-party filaments. -
Dremel also supports and recommends Simplify3D, which is well-regarded despite its complete lack of anything resembling a material library. It has a basic profile for the Dremel models, but doesn’t even support the material that comes in the box.
-
That is, Dremel officially sells and supports branded PLA, PETG, Nylon, and Eco-ABS (actually a modified PLA with a confusing name), and ships the printer with one spool of Eco-ABS and one of PETG. Simplify3D’s device profile lists PLA, ABS (apparently Eco-ABS), and Nylon; they don’t include PETG in any of their profiles, and do not clearly document how to add additional materials, although they have web pages describing common parameter ranges for many generic types of filament.
-
One last note on software: Simplify3D requires an active Internet connection at all times to work, and their “free trial” involves giving them $150 up front and asking for a refund within two weeks. Yeah, fuck that.
-
Note that third-party filament, while supported, has to be rewound onto a Dremel-sized spool before use, and you’ll want to remove the RFID tag so the printer doesn’t auto-detect it as the wrong stuff. There are plenty of designs on Thingiverse for assisting with this process.
-
By the way, Dremel says they’ll send me two free rolls of filament for blogging a review of my printer. “Your proposal is acceptable. Especially since I was going to do that anyway.”
-
Update! Just noticed that Dremel’s software also auto-detects thumb-drives as a destination to save your gcode, and offers an eject button after the copy finishes. That’s convenient.
Network printing
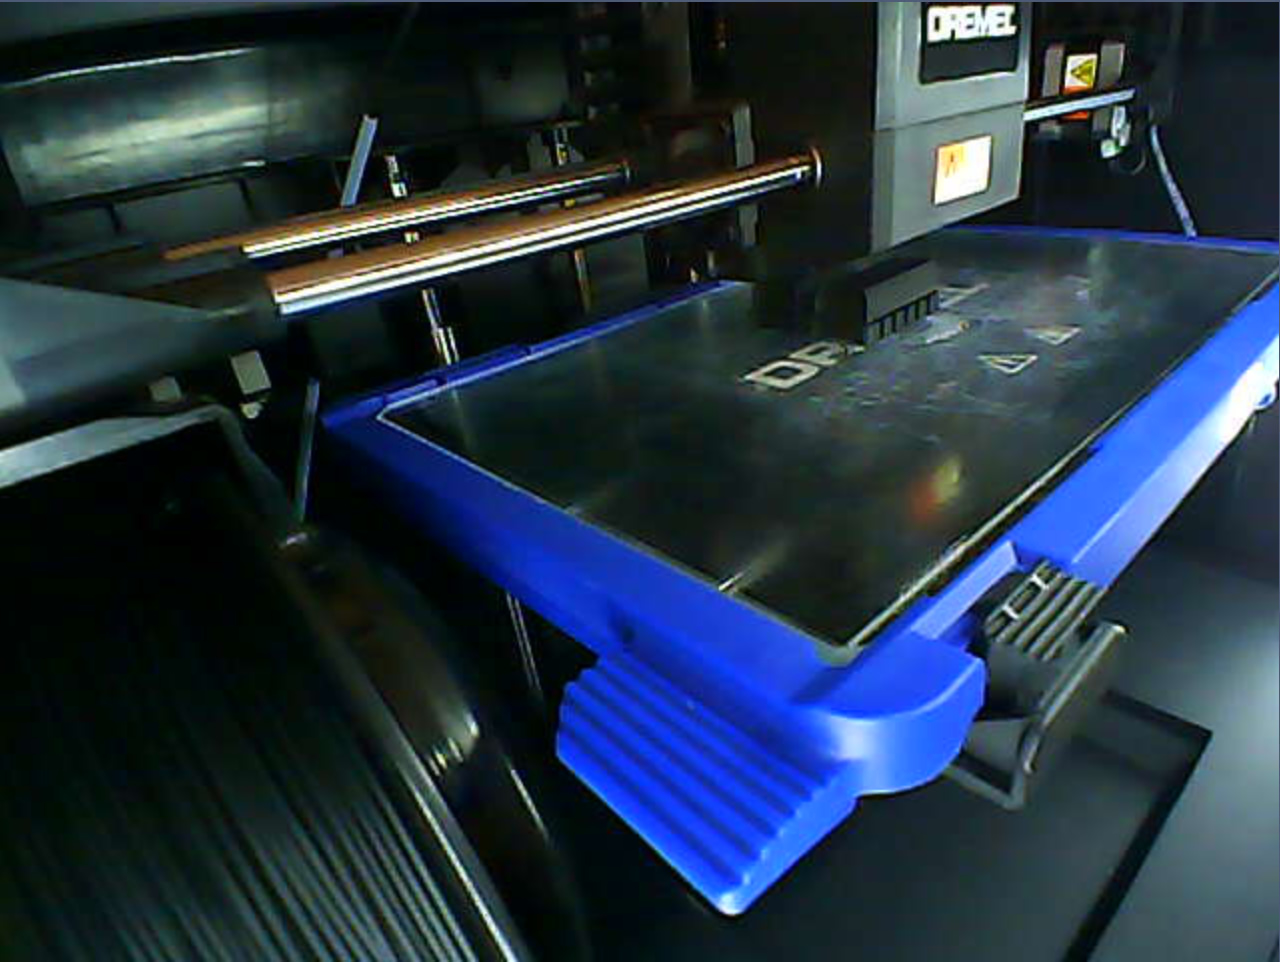
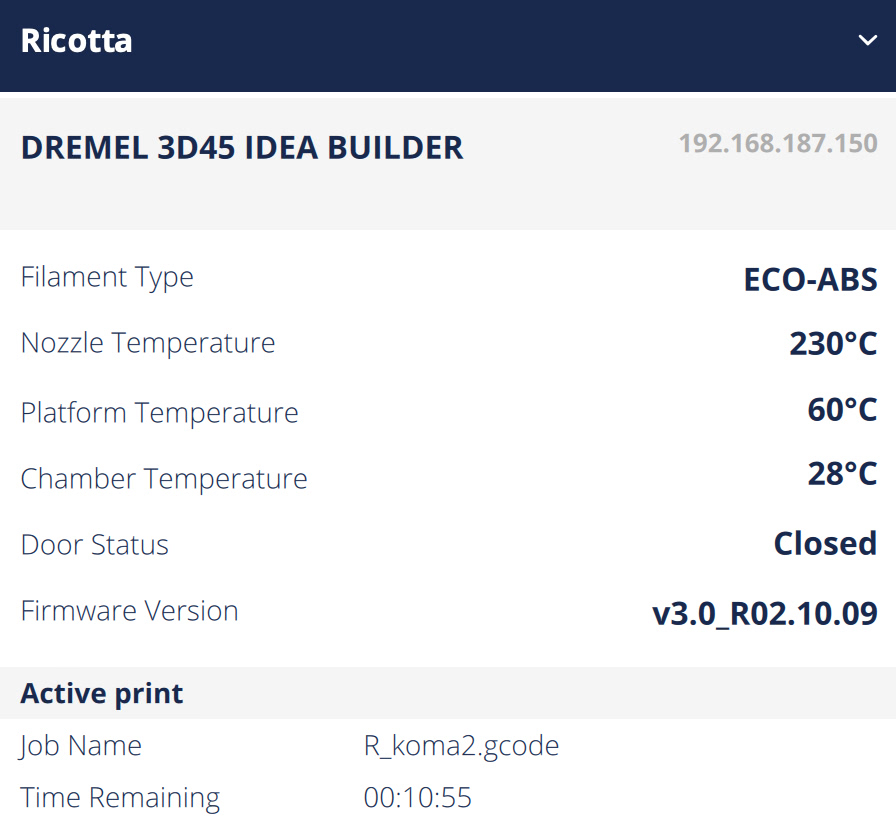
Why, yes, I did name it Ricotta; she’s a pro maker, dawg. Er, “pro maker dog”.
The proof is in the solidified pudding
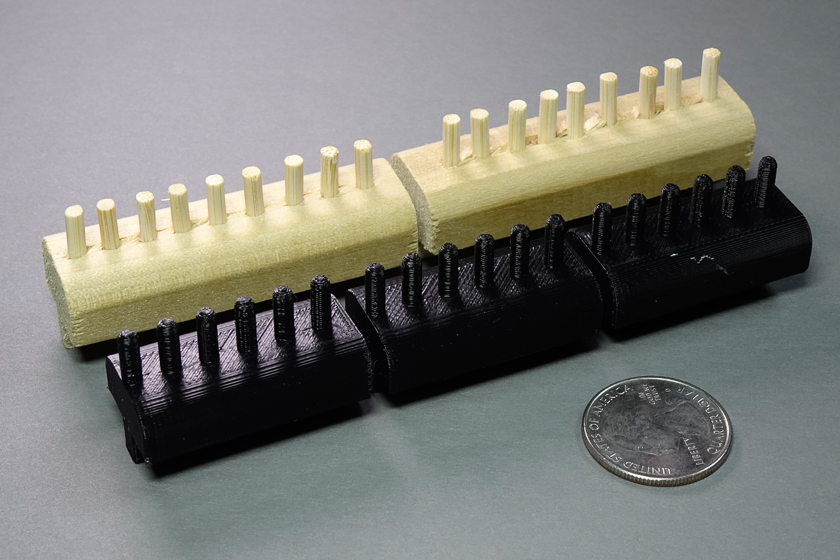
My first print job was a redesigned koma for the baby takadai. 30 minutes at medium quality, 30 more minutes after I broke one of the pins off while remembering how to cleanly remove the supports (been a few years since I used one of these, and the documentation consists only of the words “use needle nose pliers”), and I had a part that fit perfectly and worked exactly as intended.
I had it print 9 more overnight, and woke up to a full set of koma much better than what that poor woodworker had managed with a router, a drill press, and not nearly enough time to get them all out the door in time for the conference.
Note that the 3d-printed design does something that would have been a real pain with a drill press: the front pin is exactly at the front, so there’s no double-width gap between pins on adjacent koma. I swiped the idea from the Braidershand design, which gets very close to the front of the koma with their pins. Little touches like that are why their gear has an 18-month waiting list.
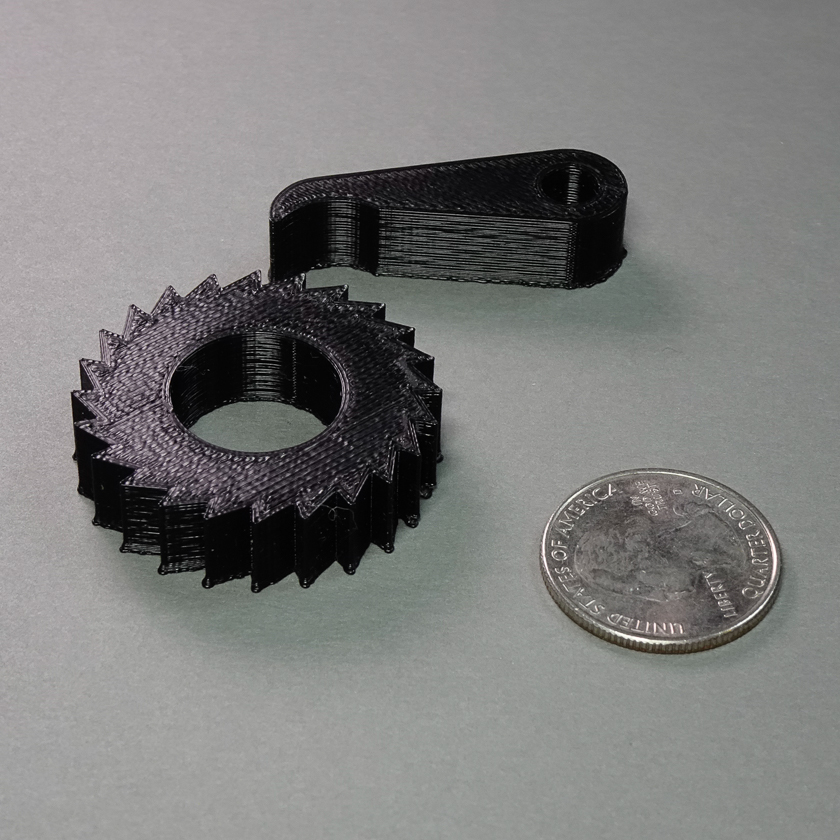
Second job was a gravity ratchet and pawl downloaded directly from the McMaster-Carr online catalog. I’m going to scale and recreate this design in OpenSCAD to use for the take-up reel in my next babydai mod.
Keep Calm and SOHCAHTOA
For the third job, I had a sudden inspiration about how to solve the problem of tensioned threads falling into the narrow gap between two koma: curve the ends. This took longer to work out on paper and in OpenSCAD than it took to print in high-speed draft mode (30 minutes for two).
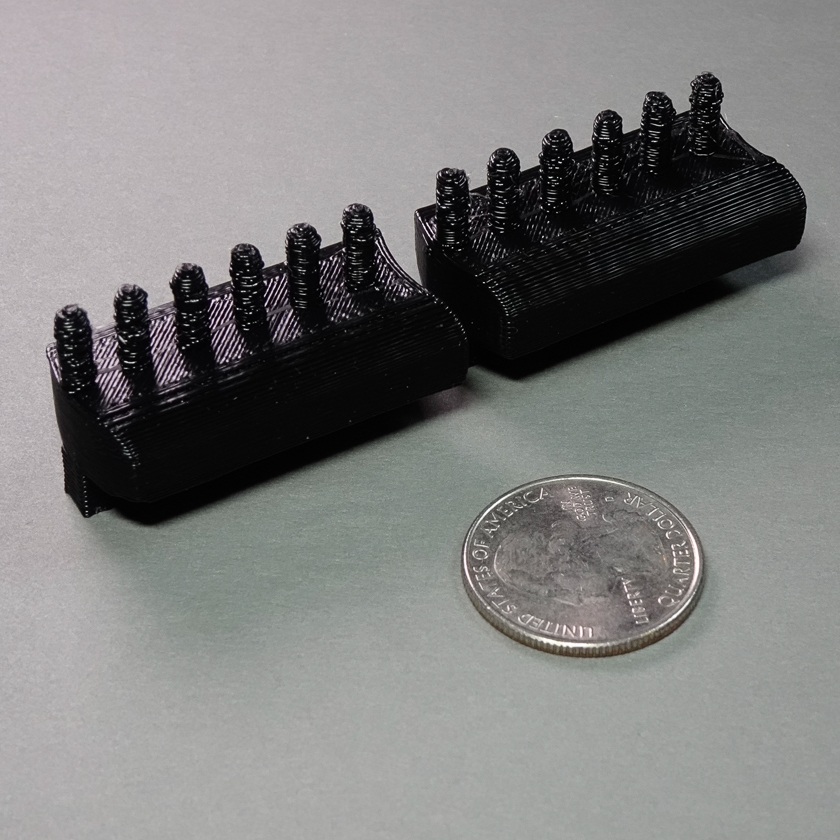
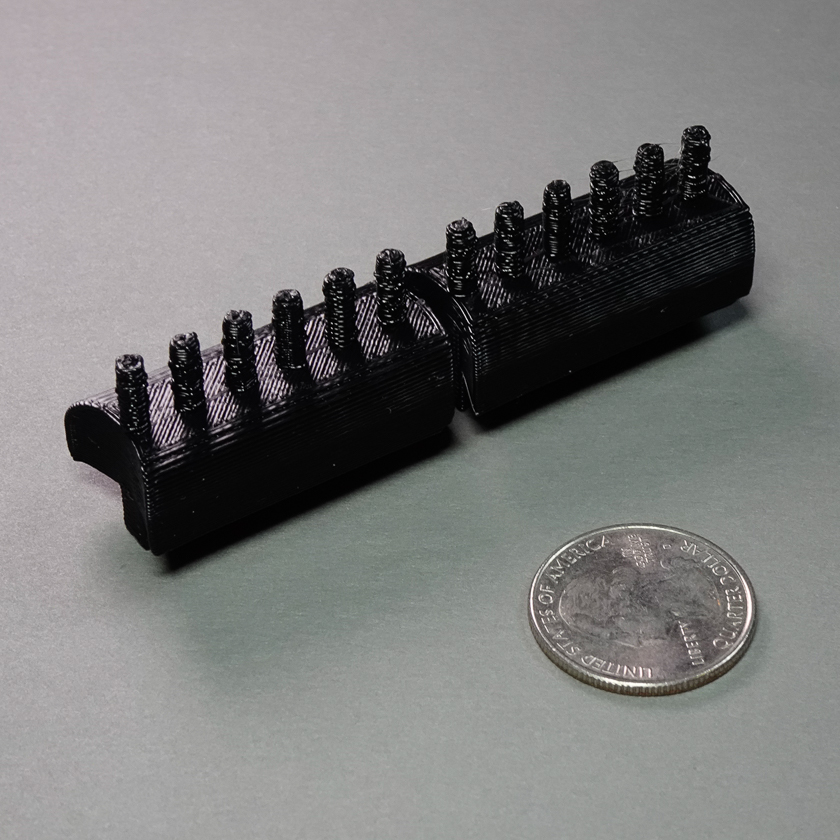
They came out exactly how I expected, and I was quickly able to confirm that the idea was sound, but I really wanted the curved ends to go the other way…
Thirty minutes later, I had another pair of prototypes.
24-hour opinion?
At this point, I have full confidence that the Dremel 3D45 will reliably deliver excellent 3D prints with their branded filament, and that I should be able to successfully import working settings for common third-party filaments when I get around to buying some.
The hardware is solid and well-designed, the software is quite capable, the filament seems to be of decent quality (if a bit hard to find right now, between Corona-chan and their change from 500-gram spools to 750-gram), and the price is reasonable for the feature set. The packaging is excellent, by the way, and easy to reuse for travel or repair.
I haven’t used the High or Ultra quality settings yet, or increased the infill percentage; Medium/20% was smooth enough and strong enough for koma with 1/8-inch pins and small weighted tama. High-Speed (draft) is kind of ugly and a bit stringy, but does what it’s supposed to.
“The battle’s done, and we kinda won…”
My next project will be a more significant drop-in mod to the baby takadai, relocating the torii, take-up reel, and sword pads, unlocking the ability to use all those new koma I printed and make much wider braids with up to 48 weighted bobbins. I’ll be releasing the OpenSCAD models and STL files so that any of the other conference attendees can mod theirs. Given the crowd, though, I’ll likely also end up printing a few sets to send people. 😁
After that, well, as much as I love the capacity of the 22 9-pin koma on my Braidershand takadai, I also like to braid with thick yarn, and my first attempt at that made me wish I had a set of 6-pin koma with big wide gaps between pins. And since my OpenSCAD design is parametric, that’s just a few long print jobs (roughly 5 hours and 38 grams of filament, each). Hardly a project at all. I’ll probably do them in white; black would be pretty harsh against maple.
Then there’s that complete parametric takadai design I did a few years back, which could be easily framed with connectors like Jonction P. And the long list of CNC projects I still haven’t gotten to. And this idea I just had for an easy tilt/shift adapter for my Sony a6500 and an old Mamiya 6x6 lens. And…
No boxes
I briefly toyed with the idea of designing parametric boxes for tama storage, since I have large quantities of bobbins in different sizes, weights, and shapes (236 total at the moment, but there will be more someday). Then I went to Michaels, based on a tip from the recent kumihimo conference. Their 99-cent crayon boxes hold 4 standard-size tama, their $1.99 pencil boxes hold 10, a larger pencil/craft box holds 9 large tama, and somewhere else in the store I found boxes that were perfect for holding 16 of the latest thing in affordable tama (another conference tip).
I don’t think I’ll need any more tama or boxes this year, but there will come a day when I’ve got 60 of one weight on the big takadai, 39 little ones on the babydai, 32 on the big marudai, 9 on the little marudai, and three dozen cats to feed.
Corona-chan Wants Candy
Unrelated, this is the first time in 20 years that I have had zero trick-or-treaters, down from the usual ~120. I bought a few pounds of candy just in case, but especially since I’ll be working from home until June, I didn’t risk a big buy.
This just in:
Fans spinning up on your Mac laptop during high network traffic? Apple ships a user-mode driver for common USB-C and Thunderbolt docks.


