Kumihimo
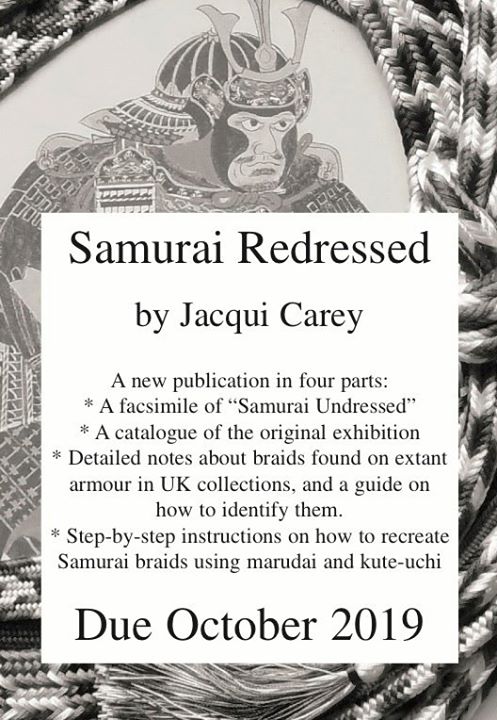
Samurai Redressed
For once, 2020 has delivered some good news, namely that Jacqui Carey’s new book on samurai armor braids has finally been released.

I’m not a big fan of Adobe Digital Editions installing DRM crap on my laptop, but Carey’s books have been heavily pirated around the world, so I understand her caution.
Update
Bought my copy this morning. It’s 129 MB on disk (376 pages), which is good for the quality of the photos and illustrations, and bad for the performance of Adobe’s extremely limited reader application. I’m used to being able to scroll through PDF files in something approximating real time, and Adobe clearly is not interested in that.
Hopefully it will eventually be released on dead trees, for greater usability.
Performance Issues
Adobe’s client is significantly faster on my iPad Mini than on my MacBook Air. Still incredibly limited in functionality, and I had to force-quit it to fix a spontaneous zoom-to-tinyfonts issue, but it at least changes pages at a consistent speed. File under “baffling” the fact that the Mac client isn’t capable of displaying two pages side-by-side, something I’d consider pretty basic functionality for a PDF viewer on modern wide-screen displays.
Discount braiding machine
According to the reviews, it’s cheap-as-in-shoddy, but I thought it was amusing to see a hand-cranked braiding machine designed to make 8 or 12-strand Kongō-gumi, marketed to tween girls for friendship bracelets. Based on how dusty the kits are that I see in stores, there’s not a big market for (literally) cranking them out by the dozen.

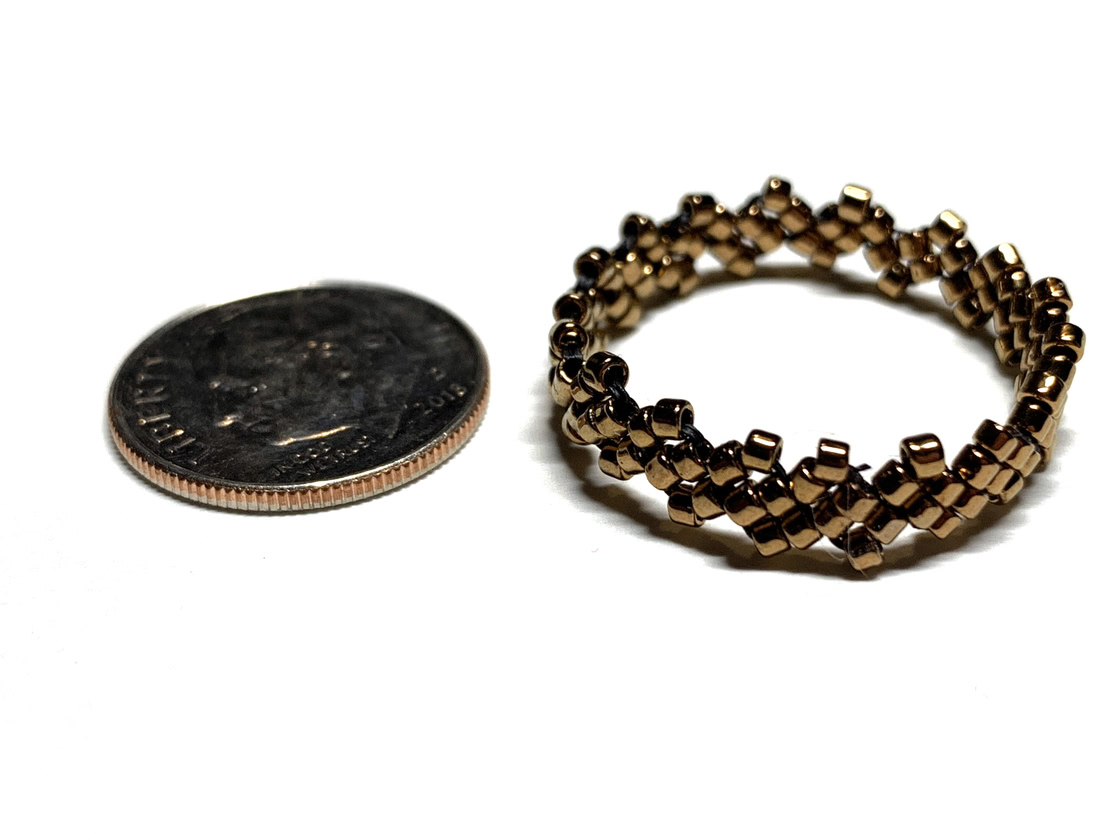
Toho Peace Ring
One of the side activities at the Retreat was labeled Peace Ring, which had a kind of hippie-drum-circle sound to it. Fortunately it wasn’t, although I found it taxing for a different reason: I’m rubbish at sewing together tiny beads.
But I gave it a shot anyway, and can proudly say that I almost managed three rows before politely giving up; well, technically I managed two rows twice, with different errors. The first problem was that the photocopied instructions were tiny and low-resolution. That was solved when someone who had the original PDF made a quick run to the hotel business office, but even the readable instructions were iffy for a novice. The second problem was the diffuse lighting in the conference room, and while my glasses allowed close focus, they lacked magnification.
It would have gone a lot more smoothly if they’d illustrated the technique with something larger than 11/0 seed beads; still tricky, but at least I’d have known what I was doing. So I made a note to dig out a bunch of cheap wooden beads and some string when I got home, to figure out the technique.
Final result:
After the jump, scaled-up pictures of the steps in the PDF:
N Interlacements of Naiki
The marudai braid Naiki (Tada #64, Creative Kumihimo 16N) has a lot of potential for interesting two-color patterns. Someday I’ll revisit the script I wrote five years ago to identify all unique patterns for a braid, and update it to correctly handle more than Edo Yattsu and Shigeuchi, but meanwhile I can at least generate random subsets of the possible interlacements and pick through them by hand.
Update
I replaced the crude single-page gallery that broke Randy’s browser with a custom Hugo sub-site that will eventually be a general-purpose gallery.
Coming Soon: Samurai Redressed
December 2020 UPDATE: now available
I have a few notes somewhere on odoshi, the braids or leather strips used to assemble yoroi armor, and had made a note to ask Makiko Tada about it if I got a chance. At the Retreat, someone happened to mention a recent post on the AKS Facebook page announcing a new Jacqui Carey book on the subject:
I did discuss it briefly with Tada-sensei at dinner, and she promised to introduce me to one of the few remaining armor-makers sometime when I’m in Tokyo.
Shigeuchi on Marudai
At the retreat this afternoon, we were discussing Makiko Tada’s adaptation of Shigeuchi for the marudai, and I pointed Randy to the tips page on Braidershand for the PDF instructions and photos of Tada-sensei making the braid.
But when I checked, the photos weren’t online anymore, and neither Google image search nor Tineye could find copies anywhere. So here they are, after the jump; click to enlarge.
Kago-uchi-dai
Miyako Messe in Kyoto hosts the Museum of Traditional Crafts. It’s small, fascinating, free, and quite expensive, because many modern examples of the various crafts are for sale. I ended up buying two Shingen-bukuro (Samurai Man-Purse), a handmade orin (the Japanese version of the popular “singing bowl”), a bottle of saké (that I should have bought more of; who knew matcha worked so well as a saké flavoring?), and an assortment of gifts. We’ll be visiting again in March.
One of the crafts on display was kumihimo, with some finished braids shown in their usual context as kimono ties, and some small sample braids next to illustrations of the equipment used to create them. There were two I’d never heard of, so I grabbed a quick pic with my phone and promptly forgot to look them up.
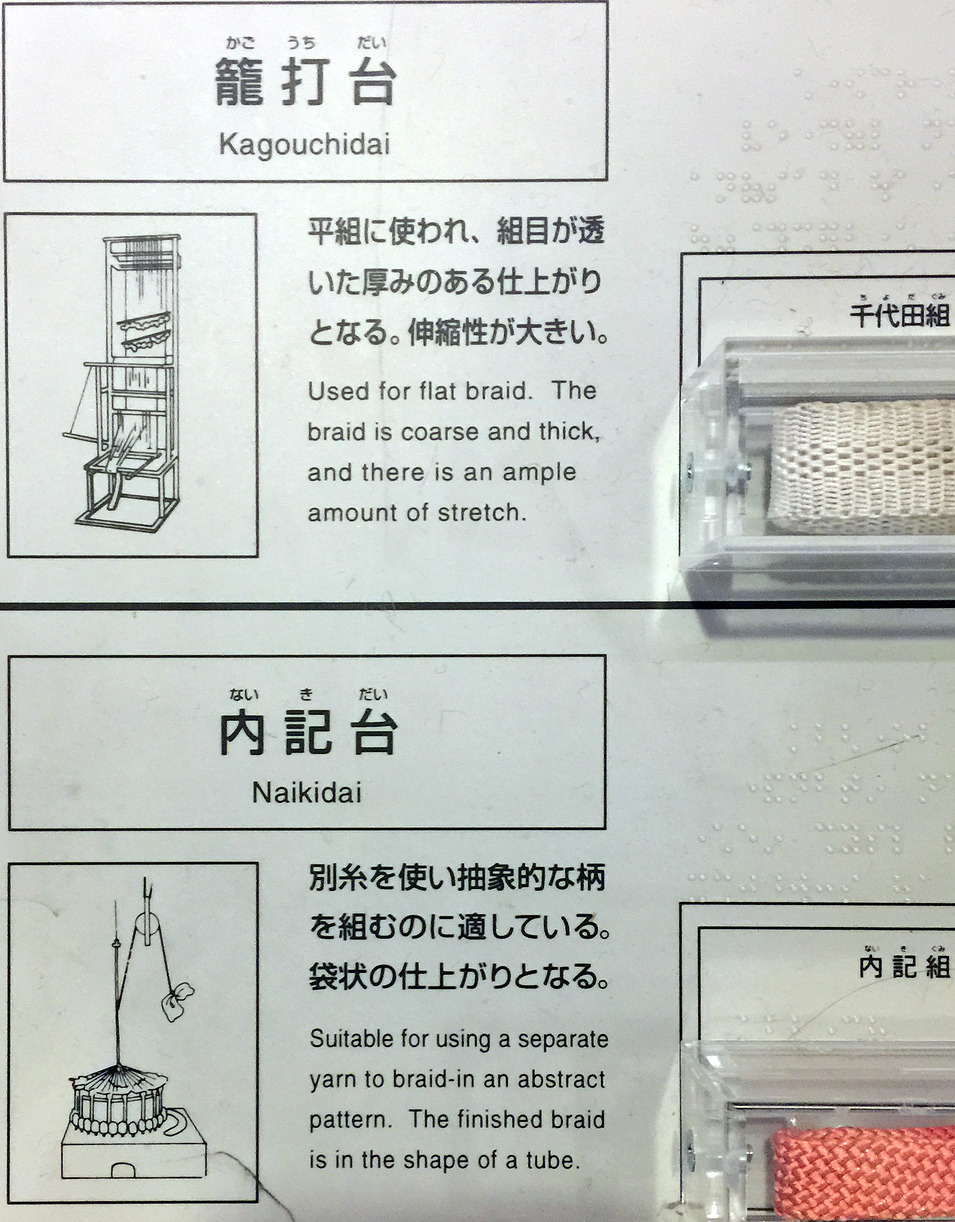
One was a special stand for making the Naiki-gumi (内記組) braid, with the appropriate name Naiki-dai. I know how to make that one on a marudai, so it was mostly of academic interest.
The other sample was called Chiyoda-gumi (千代田組), a loose chain-like structure that was more weave than braid, and the stand was an elaborate construct that looked vaguely like a warp-weighted rigid heddle loom that used kumihimo weighted bobbins for tension, called a Kago-uchi-dai (籠打台).
Last night I googled it, and the one non-BL result in English was a scanned PDF of a 1985 weaving journal article by Noémi Speiser, detailing her discovery of this device while working on her long-out-of-print book The Manual of Braiding, which, it turns out, just came back into print last November, and which includes instructions for the Naiki-dai (and, apparently, the Ayatakedai).
The text, pictures, and clear instructions in her article revealed that the Kago-uchi-dai is… a warp-weighted rigid heddle loom that uses kumihimo weighted bobbins for tension.
Well, alrighty then.
Coincidentally, a few months back, I got the idea of setting my card loom up vertically so I could use kumihimo bobbins to provide tension and allow the strands to freely untwist; I’ve been too busy to try it, but it seemed like it would work well, and now I know it will. 😁
Oh, and the kagouchi braid? Speiser identified the structure as identical to #2918 in The Ashley Book of Knots, and speculated that the rounded version the artisans told her about but didn’t show was likely #2919.
Tentative Takadai design
Between crude sketches, OpenSCAD, and playing with scrap wood, I think I’ve nailed down (so to speak…) the way I’m going to connect my parametric Takadai together.

- Instead of connecting the inner and outer arms (gedan/jōdan) with a small arm attached to the legs at one point, I'm using wedges cut from a 1x6. This is actually the "traditional" method in Japan.
- To stabilize it front-to-back, I used 1x6 stretchers a few inches above the ground. I can't put them at the top like table aprons, because the bobbins would constantly bang into them.
- To stabilize it side to side, I replaced the rear crossbar with a 1x6, which means the rear "wedges" are part of a solid board attached to both legs.
- That makes the biggest, most visible change possible: the torii and makitori-bō are now firmly attached to the frame by 1x6s. They can stand up to any amount of weighted bobbins, and the finished braid collects in an easy-to-reach location.
- Even better, that provides a perfect spot for the ratchet and pawl, replacing the chopstick brake on the makitori-bō.
- That rear 1x6 also made it possible to lower the hyojun-bō so that it doesn't sit on top of the gedan like an afterthought, and completely eliminate the sword pads. With a 1x6 back there, I can just cut out pads on each side and round them off.
Next up, building a tabletop version with 5/8-inch square dowels and 0.5x3-inch hobby boards. To keep it compact, it will only support 4 small koma on each arm; that’s enough for quite a few types of braid.
For simplicity, the tabletop Chibidai will be held together by wood screws, but for the full-sized unit I’ve got a bag of cross dowels from McMaster-Carr. I’ll use the Nomad to CNC-carve my comb-style koma and the ratchet.
[Update: I made the OpenSCAD script dump the cut list; obviously I’ll be rounding off a bit…]
- 8x hardwood balusters, 1.25x1.25:
- 4x legs, 26 inches
2x gedan, 27.8523 inches, mizo starts at 7.70228 inches
2x jodan, 32.0706 inches, mizo starts at 9.67062 inches - 7x hardwood boards, 0.75x5.5:
- 1x back board with wedge cuts, 34.75 inches
2x stretchers, 25.3523 inches (gedan - 2x baluster)
2x torii/makitori supports, 11.5 inches
2x front wedges, 7 inches - 2x 1-inch dowels, 8 inches
- 1x 0.5-inch dowel, 22 inches
- 22x koma, 3.5 inches
- 1x gravity ratchet with pawl
- 1x 0.5-inch dowel, 22 inches