Five-Star Deathmatch: The Movie
Okay, now that I have a (half-dozen implementations of a…) well-tested image-ranking Python script, how do you use it?
-
Download deathmatch.py
-
Install Flask:
pip install Flask -
Run the script with a single argument, the name of a directory full of PNG and/or JPG images:
python deathmatch.py /Volume/galparty/freshand open a browser window to http://127.0.0.1:5000, You should see a status bar at top, the first image in the directory by modification time, a help button in the upper right, and two rows of buttons at the bottom.
-
The first row of buttons are rank. All images start at 0, and can either be promoted by pressing 1-5 or rejected by pressing X. This will update the matching buttons at the bottom and advance to the next image.
-
The second row of buttons are flags. One or more can be selected by pressing A-F; this will not advance to the next image, so you can flag a picture before ranking it. Flags mean whatever you want them to, and are there so you can easily mark images that are interesting for reasons other than quality (“family”, “funny”, “disturbingly similar to that girl from Frozen”, etc). The far-right button matches images that do not have any flags set.
-
Clicking on any of the buttons excludes matching images from the display.
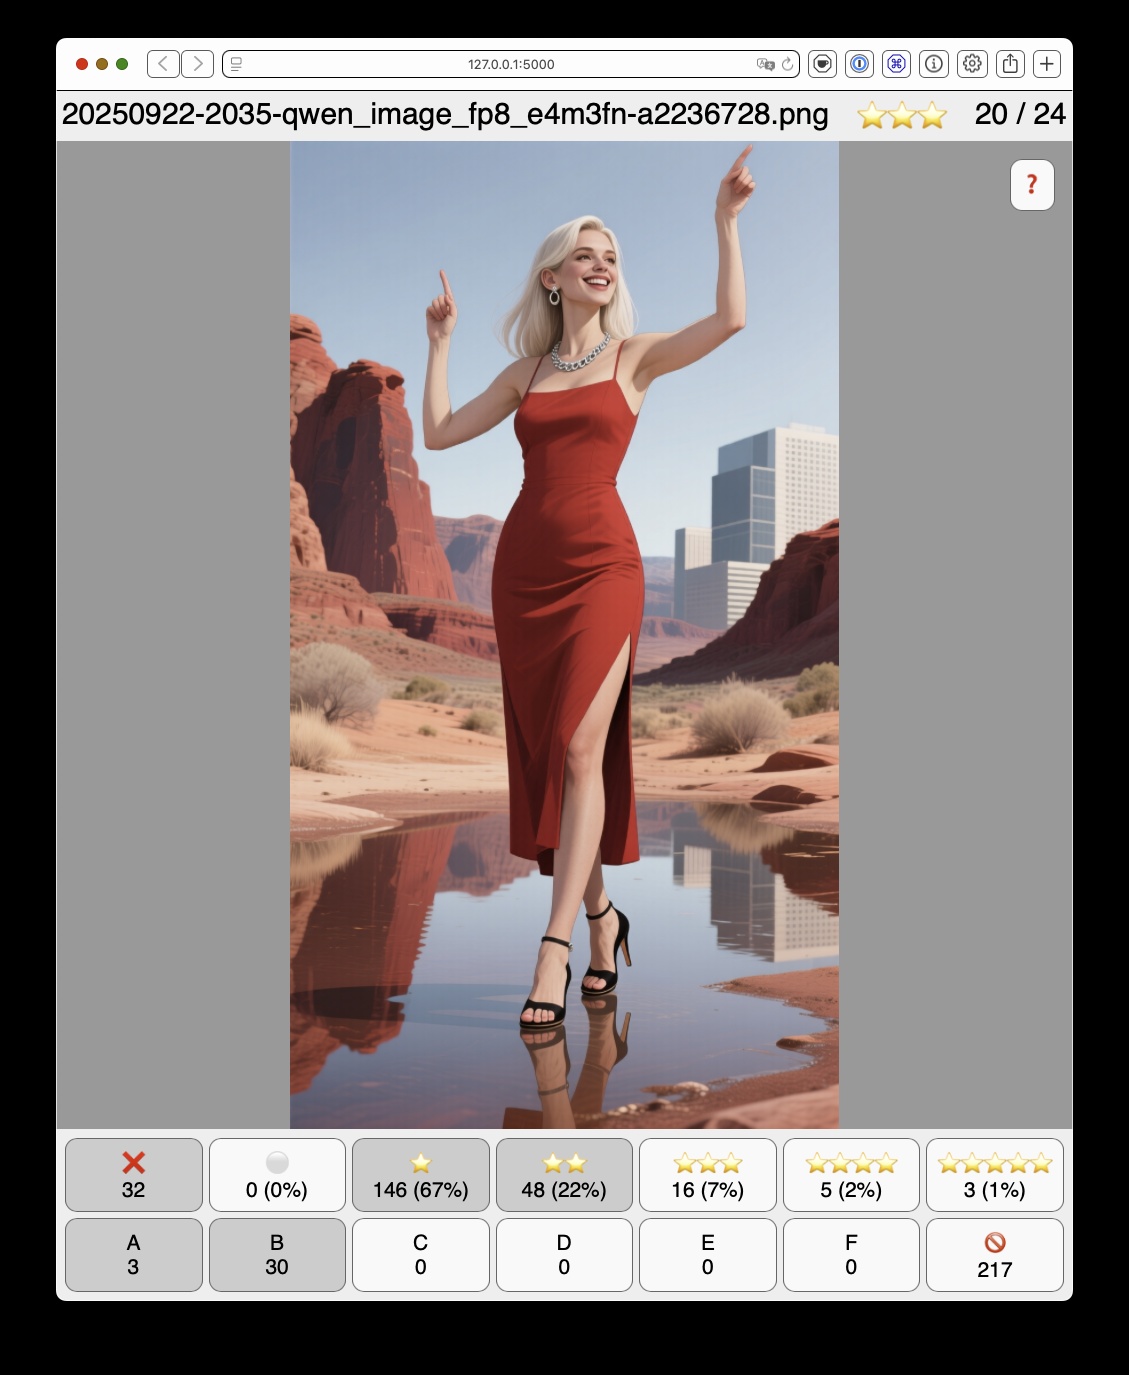
(pretty sure there’s no giant office complex in Red Rock Canyon…)
Ranking and flags are stored in the same directory in a file named
_rank.txt. The fields are separated with tabs. This file is updated
every time you change a rank or flag, so your progress is
automatically saved.
Running a deathmatch
-
Run the program in a directory full of images and click each of the following buttons: X, 1, 2, 3, 4, and 5, filtering the list to show only rank 0 images (all of them the first time).
-
Starting with the first image, press either X or 1. Make this a very quick pass that just takes out the trash. Out of focus, picture of lens cap, shakycam, AI gal with three arms, etc. When you’re done, you’ll have no images left at rank 0.
-
Click the 0 and 1 buttons, so that only rank 1 images are displayed. Make a pass across all rank 1 images, promoting exactly one-third to 2. The easiest way to do this is just have your fingers on the 1 and 2 keys rather than using right-arrow to skip the 1’s. Be brutal; you’re picking your best. If a picture is interesting, flag it with A-F.
-
(Optional: walk away for an hour or a day, and come back fresh) Adjust your filters and make a pass across all rank 2 images, promoting exactly one-third to 3.
-
Rinse and repeat two more times, until 1/81 (1.2%) of your original rank 1 images are ranked 5.
Since this isn’t a full photo-management app, there’s no convenient
way to package up your selected pics for printing or editing, but you
can copy-paste the filename from the top-left corner, or make a copy
of the _rank.txt file and edit it down to just the ones you want.
[Update: I cleaned up the code and added a simple export: press L to copy the current visible list to the clipboard, one per line]
There are five six additional commands available:
- Up and Down-arrow, to take you to the beginning/end of the list
- Z for zoom, to see images at full size with scrollbars
- R for reset, to turn off all active filters
- L to copy the list of visible images to the clipboard
- SPACEBAR to reload the image list from the directory, in case you’ve got an AI actively generating images in the background, as one does.
Unrelated,
The new Dr Seuss LoRA for Qwen Image doesn’t really work for illustrating Red Sonja.

Comments via Isso
Markdown formatting and simple HTML accepted.
Sometimes you have to double-click to enter text in the form (interaction between Isso and Bootstrap?). Tab is more reliable.